I started this scrappy project as a way to use little "garbage" scraps. Pieces that are too small to use - like the skinny strips you trim off a block to square it up; or a big pile of thread scraps. For more about this project or any of our 12 scrappy projects in 2012, click here.
The how-to for the liner can be found here. Once the liner is full, you'll need a nice scrappy, quilted cover for it.
To begin, you need the measurements of your liner, as the cover will be made the same size. The first step is to make the quilted top of the cover. You can make any design you like - it could be simple strips of fabric sewn together, or big chunks of fabrics pieced randomly; it could be made up of leftover or "orphan" blocks, or it could be squares like mine.
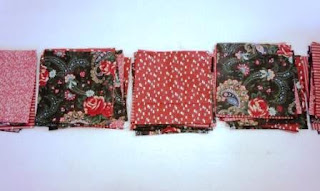
I used a few large pieces of scrap fabric and cut 5-1/2" squares from them. The top should start out a little bigger than the liner top because we'll be quilting it, which may result in a slightly smaller top when we're done. My liner top is 26" X 38", so to make it really easy I rounded up to 30 X 40. Then I cut (48) 5-1/2" squares that would finish at 5" square. These are laid out 6 across and 8 down, like this:
I carefully stacked them for chain-piecing. Each of the 6 stacks has all 8 blocks from its column:
Then I can zip along, chain-piecing them together:
Once all the rows are pieced and pressed - pressing one row to the left, the next to the right, etc. - we can sew the rows together to complete the top. Set that aside.
Since we're going to quilt the top part of this bed, we need a backing. You can use just about anything you'd like. If you have a large piece of fabric you want to use up, that would work here. You could also use muslin, or piece a bunch of scraps together. However you come up with a backing, add it and a piece of batting to your top to make a quilt sandwich and quilt as desired.
I pieced my backing from a lot of scraps . . .
. . . and quilted with a meandering loop design:
Now we can trim it to the same size as the top of the bed liner. If you rounded the corners on the liner, be sure and round them on the quilt as well.
To make the bed bottom, we'll make an envelope-type closure like you see on some pillow covers. I pieced 2 sections approximately the same size as the liner bottom:
Using the quilt top for size and position reference, lay the two bottom pieces out. Fold an end of each piece under with the folds toward the center. Fold about 1/4 to 1/3 of each piece under, so you have a nice overlap of the two. Round the 4 outer corners to match the top:
I added a little strip of interfacing in between the layers at a spot where I would be stitching the velcro. I also hemmed the raw edge that is folded under.
(This was much easier to make than to explain! I think the pieced fabrics also make the pictures look a bit more complicated than they are.)
Add velcro pieces at this point (the section on the left is folded back in the picture so you can see the velcro):
Remove the quilted top. Baste the sides where the two fabrics overlap to hold them in place while you stitch the side strips to the bottom.
Piece strips of fabric together to make the side strips (like we did with the liner) and stitch the side strip to the quilt top.
Then stitch the side to the bottom section, again like we did with the liner, except this time don't leave a section open to turn - you can turn it through the envelope part.
Turn the whole cover right side out and push corners out. Stuff with filled liner.
My liner is not full yet, but here's a picture of it so far - you can see how lumpy it is:
And here's what it will look like in the cover (only fuller):
Pin It
I'd love to see how yours turn out! Please consider posting a picture on our Facebook page!


Love it! I have been collected my "garbage" scraps but I am nowhere near close to having enough for a doggie bed yet!
ReplyDeleteThis is cute. The cloth used was colorful and the design is beautiful.
ReplyDeleteThank you so much! Tucker loves it!! :)
Delete