
Then square up your quilt and trim all three layers even with the top layer.

Next, flip the quilt over and pin the unquilted part of the backing away from the edges The batting stays with the quilt top:

Set the quilt aside while we prepare the Prairie Points. Use the (80) 4" squares cut from the focus fabric and scraps to make the Points. Begin by folding a square in half, wrong sides together, diagonally; press. Fold in half diagonally again and press:

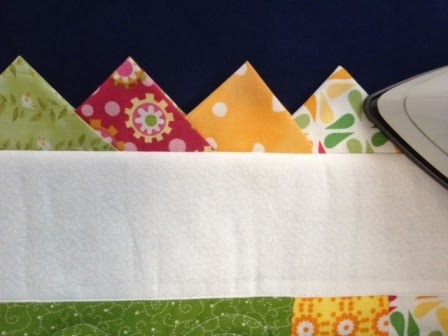
Once all the Prairie Points are pressed, begin laying them along one edge of the quilt, starting in one corner and matching the raw edges. Lay them out randomly, but keep in mind you have a lot more focus fabric points than any other so use them often.

Prairie Points overlap each other. One side of the folds is closed and one is open. The open side in my picture is the side on the left. The next point will be inserted in between the folds on the open side:

Lay 23 points along the long sides of the quilt and 17 along the short sides, spacing them evenly (you can just eyeball it!). Insert each point in between the folds of the one to its right like the picture above.
When you turn the corner, they just butt up against each other, as shown below:

Once you have one side evenly spaced and the points all properly laid out, pin each one to hold it. Now you can continue on with the remaining 3 sides or stitch the pinned side first. Stitch 1/4" from the raw edges, making sure you catch all layers except the backing fabric.
Note: if you are making a boy's quilt, the Prairie Points are often left pointing toward the center like this and a binding is added to finish the edge.
Take the quilt to your ironing board and flip the points toward the outside, turning the raw edges under as you do. Press them well all the way around:
Unpin the backing and press fabric smooth. Now we just need to turn under a quarter inch and hand-stitch the backing to the Prairie Points, covering up the seam:

You may have to use a couple of extra pins and kind of work the corners to get them square. Just keep smoothing the fabrics and making sure you're not pulling one side too tight. Once you've hand-stitched the backing in place, you can go back and quilt the border. And it's done!

Please consider posting a picture of your finished Scrappy Rails to our Facebook page!
Thank you for the prairie point tutorial - I have always wanted to learn how to make them!
ReplyDelete